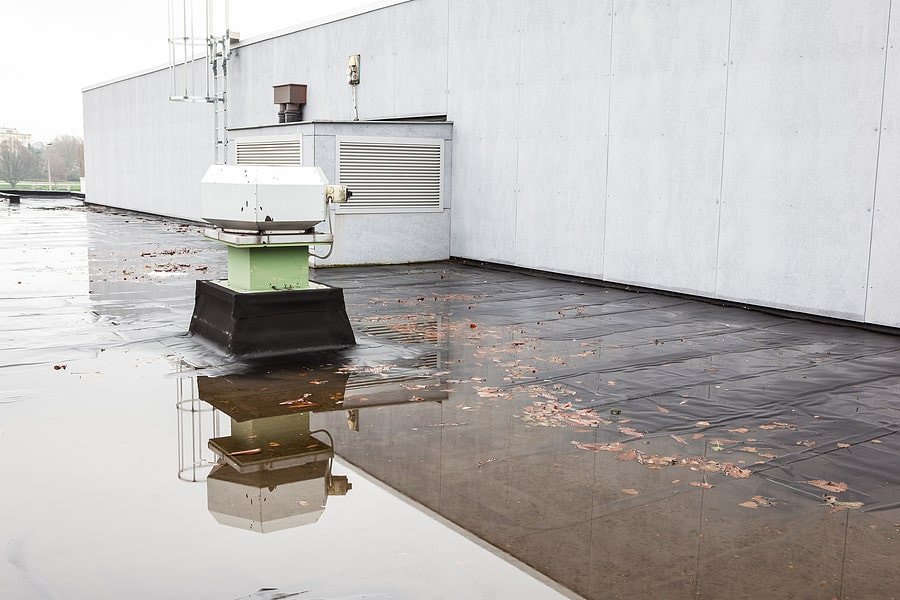
Finding a leak on a flat roof is harder than finding one on a sloped roof because water travels laterally under the membrane before it finds a path down through the deck. On a sloped shingle roof, the leak is usually within a few feet uphill of the interior stain. On a flat roof, the hole in the membrane can be 20 to 40 feet from where the water finally drips through the ceiling — on the opposite side of the building, behind a parapet wall, or at a penetration that looks perfectly intact from above.
The most reliable method for finding a flat roof leak is to start inside, map the wet area in the ceiling or the deck, measure to a fixed reference point, and then inspect the roof surface in expanding circles around that mapped location — checking the seams, the penetrations, and the parapet wall flashing before ever considering that the membrane itself might be punctured. The membrane is rarely the problem. The seams, the flashings, and the drains are almost always the problem.
Contents
- 1 Step 1: Map the Interior Leak to the Roof Surface
- 2 Step 2: Inspect the Seams and Penetrations First
- 3 Step 3: The Controlled Water Test for Flat Roofs
- 4 Step 4: Using a Moisture Meter to Find Wet Insulation
- 5 When to Call a Professional for Flat Roof Leak Detection
- 6 FAQ: Common Questions About Flat Roof Leaks
- 7 Flat Roof Leaks: Start Inside, Work Outward, Follow the Water Uphill
Step 1: Map the Interior Leak to the Roof Surface
Go to the interior stain and measure its location relative to two fixed reference points that penetrate the roof — a plumbing vent pipe, a drain, a skylight, a parapet wall, or the edge of the building. Measure the distance from each reference point to the center of the stain and write both numbers down. On the roof, use those two measurements to triangulate the spot directly above the interior leak.
Mark that spot on the roof surface with a grease pencil or a piece of blue painter’s tape. Draw a circle with a 10-foot radius around the mark. The actual hole in the membrane is inside that circle, somewhere uphill. On a flat roof, “uphill” means toward the high side of the roof — the side opposite the drains. Water always flows toward the low point, and the leak at the ceiling is almost always lower than the hole in the membrane.
If the interior ceiling is finished and you cannot access the underside of the deck, you have two options: cut a small inspection hole in the drywall (you will be patching it anyway to fix the stain), or skip directly to the roof surface inspection and work outward from the most likely leak sources — the penetrations and the parapet walls.
Why flat roof leaks travel so far: The membrane sits on top of insulation board, and water can flow laterally across the top of the insulation for 20 feet or more before finding a gap in the insulation boards — a butt joint, a fastener penetration, or a seam between boards — where it can drop down to the deck. Once on the deck, water follows the slope toward the drains, dripping through any plywood joint, fastener hole, or electrical penetration along the way.
Step 2: Inspect the Seams and Penetrations First
On a flat roof, the seams and penetrations account for roughly 85% of all leaks. The membrane itself — the broad, uninterrupted field of rubber, TPO, or PVC — accounts for the remaining 15%, and those are almost always punctures from dropped tools, foot traffic, or wind-blown debris, which are visible to the naked eye.
Inspect every feature in the mapped search area in this order:
- Seams. On an EPDM roof, look for loose or peeling seam tape — the adhesive dries out over 15 to 20 years, and the tape lifts at the edge. On a TPO or PVC roof, look for gaps, wrinkles, or discoloration at the heat-welded seams. A properly welded TPO seam is smooth and uniform. A failed seam is gapped, curled, or has a visible crack along the weld line.
- Penetrations. Inspect every pipe, vent, conduit, and HVAC curb that passes through the roof. Check the rubber boot around each pipe for cracks. Check the sealant at the base of every penetration — if the sealant has separated from the membrane or the pipe on one side, water is entering that gap.
- Parapet walls and edge terminations. Walk the perimeter of the roof and check where the membrane meets the parapet wall. The membrane should run up the wall at least 8 inches and be covered by a metal coping cap or counter flashing. If the membrane has pulled away from the wall at any point, or if the coping cap has lifted, water is entering the wall-roof junction.
- Drains and scuppers. Check the roof drains and scupper openings for debris blocking the flow. A clogged drain causes water to pond across a large area of the roof, and the standing water finds its way through seam gaps and fastener holes that would remain dry if the roof drained properly.
Step 3: The Controlled Water Test for Flat Roofs
If the visual inspection does not find the leak, the water test will. On a flat roof, the water test requires even more patience than on a sloped roof because the water has farther to travel before it appears inside.
- Work with a partner. One person on the roof with a garden hose. One person at the interior leak location. Communicate by cell phone.
- Start at the lowest point in the mapped search area — the area closest to the drain or scupper on that side of the roof. Soak a 5-by-5-foot section for 10 minutes. Flat roof leaks are slower than sloped roof leaks because the water has to saturate the insulation before it reaches the deck.
- If no water appears after 10 minutes, move the hose uphill 5 feet. Soak the next section for 10 minutes. Repeat, working uphill in 5-foot increments. When water finally appears at the interior observation point, the leak is in the section you are currently soaking.
- Narrow the search. Within that 5-foot section, direct the hose to one feature at a time — first the seam, then the penetration, then a specific area of the membrane. Soak each for 10 minutes. When water appears, mark the exact spot.
- Mark the leak on the roof surface. Circle the leak source with a grease pencil. If the leak is at a seam, mark the seam for its full length — a failed seam often leaks along several feet, not at a single point.
The 10-minute soak rule: On a flat roof, water takes 5 to 10 minutes to saturate the insulation board, reach the deck, and produce a visible drip at the ceiling. Moving the hose after 3 minutes guarantees a false negative. Set a timer on your phone. Do not guess at the time.
Step 4: Using a Moisture Meter to Find Wet Insulation
A moisture meter is the fastest way to map the extent of water damage under a flat roof membrane without cutting into the roof. The meter measures the electrical resistance or capacitance of the roofing assembly — wet insulation conducts electricity differently than dry insulation — and provides a relative moisture reading at each test point.
Walk the roof in a grid pattern, taking readings every 5 to 10 feet. Mark each reading location with chalk and write the moisture value next to it. When you have finished, the chalk marks will form a moisture map: dry areas with low readings and wet areas with high readings. The highest readings form a path from the leak source toward the drain — the path the water has been following under the membrane.
Follow the high readings uphill to the point where the readings drop back to dry. That transition point is the leak source — the point where water is entering the roofing assembly. The wet path downhill from that point is the damage that the leak has already caused.
A moisture meter costs $40 to $120 for a basic pin-type model at a hardware store. Professional roofing contractors use non-invasive capacitance meters ($300 to $800) that read through the membrane without puncturing it. For a one-time leak diagnosis, the $50 pin meter is adequate — it requires poking two small holes through the membrane, which you will patch with a dab of sealant after the test.
When to Call a Professional for Flat Roof Leak Detection
Stop the DIY search and call a commercial roofing contractor if: the roof is larger than 1,000 square feet (the water test becomes impractical); the leak does not appear after an hour of controlled water testing (the water may be entering at a parapet wall cap or a through-wall flashing that is not accessible from the roof surface); you suspect wet insulation across more than 25% of the roof area (the roof may need replacement, not a patch); or the roof surface is soft and spongy underfoot (the decking is already rotted and walking on the roof is unsafe).
Professional leak detection for a flat roof costs $300 to $600 for a standard inspection and $500 to $1,200 for an infrared thermography scan that maps wet insulation across the entire roof surface without cutting or probing. The infrared scan is done from the roof surface with a handheld thermal camera in the early evening, when the roof cools and wet insulation retains heat longer than dry insulation, creating a visible temperature difference on the thermal image.
FAQ: Common Questions About Flat Roof Leaks
How do I know if the leak is at a seam or in the membrane itself?
If the leak is within 2 feet of a seam, the seam is the source. Field-fabricated seams are the weakest part of any flat roof membrane, and the adhesive or heat-weld at a seam degrades long before the membrane itself fails. A leak in the middle of a membrane sheet is almost always a puncture from a dropped tool, a fallen branch, or foot traffic. Look for a small cut or hole — it will be darker than the surrounding membrane because dirt has accumulated in the cut.
My flat roof has standing water 2 days after rain. Is that causing the leak?
Probably. Standing water — called ponding — accelerates membrane degradation because the water is in continuous contact with the membrane surface while the sun’s UV radiation beats down through the water. The combination of water, heat, and UV is far more aggressive than any of those factors alone. A roof that ponds water will develop leaks at its seams 5 to 10 years earlier than a roof that drains completely within 48 hours of rain. The ponding itself may not be the current leak source, but it created the conditions that caused the seam or flashing to fail early.
Flat Roof Leaks: Start Inside, Work Outward, Follow the Water Uphill
The four-step sequence — (1) map the interior stain to the roof surface, (2) inspect seams and penetrations in the mapped area, (3) run a controlled water test if the visual inspection fails, (4) use a moisture meter to map the extent of wet insulation — will find the leak on almost any flat roof under 1,000 square feet. The seams and the penetrations are the source 85% of the time. The membrane itself is the source 15% of the time — and those leaks are visible punctures, not mysterious invisible holes.
The most important rule of flat roof leak detection is the 10-minute soak time. A flat roof leak takes minutes to travel through the insulation and the deck before it shows up inside. Moving the hose too fast is the single most common reason a water test fails to find a leak that is definitely there.